­

Why Did You Eat That: Not Pumpkin Muffins

By |November 7th, 2011|Recipes, Why Did You Eat That?|

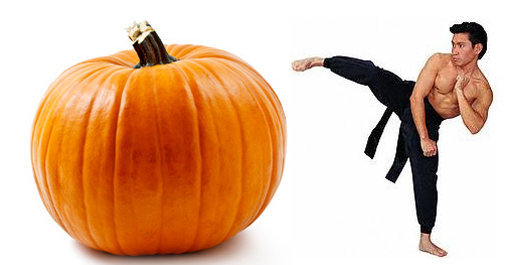
By the end of October, I’ve overindulged in pumpkin spice lattes, pumpkin cupcakes, and pumpkin pie.  To be honest, the thought of pumpkin anything makes me want to high kick a gourd… at least until Thanksgiving and it’s time for pumpkin pie again.  Just because I want nothing to do with this orange vegetable (or is it a fruit?) doesn’t mean that I don’t want delicious baked goods.  That is why I searched for a non-pumpkin, yet still seasonally festive snack.  And would you just look what I found?

Ingredients:

  • 2 cups flour, plus 1/2 tablespoon, divided
  • 1 cup sugar, plus 1 tablespoon, divided
  • 1 1/2 teaspoons baking powder
  • 1 teaspoon salt
  • 1/2 teaspoon baking soda
  • 2 teaspoons grated orange rind
  • 3/4 cup orange juice
  • 1/4 cup canola oil
  • 1 large egg, lightly beaten
  • 1 cup dried cranberries, or 2 cups fresh cranberries, chopped
  • 1/3 cup chopped walnuts, toasted
  • Cooking spray

Directions: 

  1. Preheat oven to 400°F.
  2. Spray two eight-cup muffin tins with cooking spray.
  3. In a large mixing bowl, whisk together 2 cups flour, 1 cup sugar, baking powder, salt, and baking soda. Make an indentation in the middle.
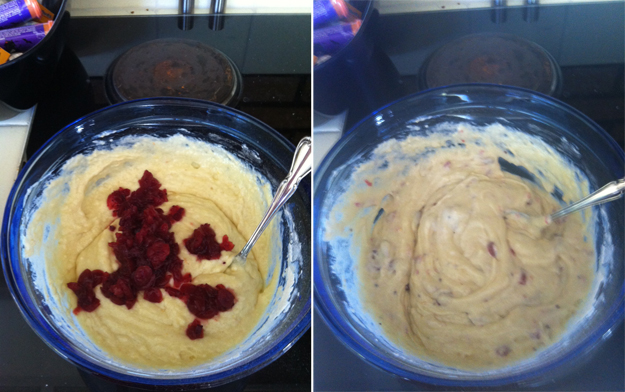
  4. In a large glass measuring cup, mix orange rind, juice, oil and egg. Pour mixture into flour indentation and stir until everything is just combined.
  5. In a small bowl, stir dried cranberries, toasted walnuts, and remaining 1/2 tablespoon flour. Stir into batter.
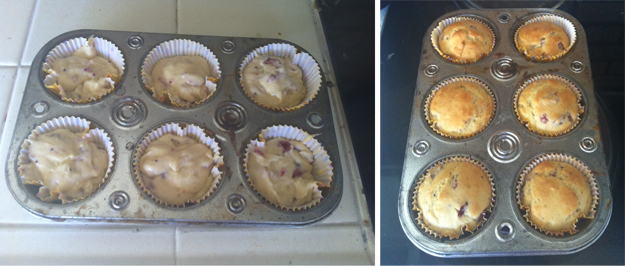
  6. Divide batter evenly among muffin tins. Sprinkle with reserved 1 tablespoon sugar. Bake 15 minutes.
  7. Remove from tins and cool on a wire rack.

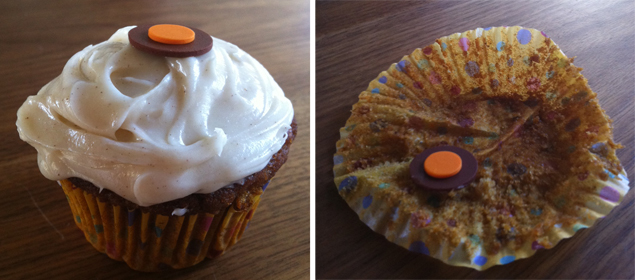
Perfect with breakfast or warmed up with vanilla bean ice cream for dessert.
xx,
WhyDid

Why Did You Eat That: Pumpkin Patch Snack

By |October 17th, 2011|Recipes, Why Did You Eat That?|

It’s pretty clear that people are crazy for pumpkins.  Pumpkin lattes, pumpkin pie, pumpkin bread.  I mean, if you can add a pumpkin to it, people are gonna eat it.  I know this because I saw a stand for pumpkin topped pizza at Half Moon Bay’s Pumpkin Festival this past weekend.  The only thing I didn’t see was pumpkin wine… and I’m wondering when that’s gonna happen cause then I’ll be a truly happy camper.  This leads me to believe that if you combined pumpkins and cupcakes… you’d really have a homerun.  And someone’s beaten me to the punch…

There’s a magical place called Sprinkles where I first encountered the pumpkin cupcake and it was love at first bite.  Sadly, there isn’t a Sprinkles on every street corner, so not everyone has access to such delightful baked goods.  Lucky for you and me… and everyone else reading this post, I’m about to let you in on a little secret.  Sprinkles was smart enough to realize that they just can’t franchise fast enough.  So, they’ve packaged their cupcake goodness and you can buy it at Williams-Sonoma (and at their store, but if you don’t have a store then you can’t buy it… and if you were in the store, wouldn’t you just buy a cupcake?).  This weekend, I took on the task of whipping up these babies.

Now, since I’ve been going on and on and on about pumpkin cupcakes… you probably would like to make them (and eat them).  And because it will take too long to either 1) order and wait for your Sprinkles Cupcake Mix to arrive, or 2) find your closest Williams-Sonoma, I’ve taken the liberty of providing you with an alternate cupcake recipe (but have kept the Sprinkles Icing recipe – which is kinda the best part).

Ingredients: 

Pumpkin Cupcakes

  • 1 1/8 cups all-purpose flour, sift before measuring
  • 1/2 tablespoon baking powder
  • 1/4 teaspoon baking soda
  • 1/4 teaspoon salt
  • 3/8 teaspoon ground cinnamon
  • 1/4 teaspoon ground ginger
  • 1/4 teaspoon ground nutmeg
  • 1/4 cup butter, softened
  • 5/6 cups sugar
  • 1 eggs, beaten until frothy
  • 1/2 cup mashed cooked or canned pumpkin
  • 3/8 cup milk

Cinnamon Cream Cheese Frosting

  • 8oz. cold cream cheese
  • 1 stick (113g) unsalted  butter, firm but not cold
  • 1/8 tsp salt
  • 1/2 tsp cinnamon
  • 3 3/4 cups confectioners’ sugar
  • 1/2 tsp vanilla

Directions:

  1. Sift together the flour, baking powder, baking soda, salt, ginger, cinnamon, and nutmeg into a bowl.
  2. Cream butter and sugar until light and fluffy; beat in eggs.
  3. Blend in mashed pumpkin.
  4. Stir in the sifted dry ingredients alternately with the milk, blending until batter is smooth after each addition.
  5. Spoon batter into well-greased and floured or paper-lined muffin pan cups.
  6. Fill about 2/3 full.
  7. Bake at 375° for 25 minutes, or until a wooden pick or cake tester inserted in center comes out clean.
  8. Meanwhile, in the bowl of an electric mixer fitted with the flat beater, beat the cream cheese, butter, salt, and cinnamon on medium-low speed until smooth and creamy, 2 to 3 minutes.
  9. Reduce the speed to low, gradually add the confectioners’ sugar and beat until incorporated.
  10. Add the vanilla and beat just until incorporated.  Do not overmix or the frosting will incorporate too much air.  It should be creamy and dense, like ice cream.
  11. Add milk 1 tsp at a time if frosting does not have a spreadable consistency.

If this doesn’t get you into a festively fall mood, then I really don’t know what will.  Probably that pumpkin wine.

xx,
WhyDid


*Editor’s Note: I did, in fact, make that cupcake up above.  Sprinkles is so thoughtful that they even include the cute little candy dots. 

Why Did You Eat That: Spar-becue

By |September 26th, 2011|Guest Blogger, Recipes, Why Did You Eat That?|

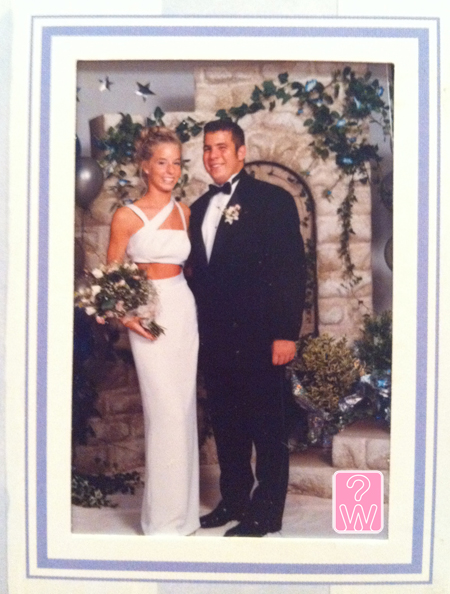
This week, I asked one of my oldest (not in age, but in friendship duration) and very dearest friends if he’d be willing to share one of his recipes.  I know I’m partial, but I can’t believe that not only can my pal speak German fluently, recite Shakespeare, and mix up the perfect purple drank, he can cook!   I mean, ladies, how is this man single?  Anyway, this isn’t some froofy girly girl recipe … so if you wanna impress your main man with something delicious that he will appreciate, keep reading. (Oh… and please behold this amazing school dance photo of me my male bff.  Sorry, dude, had to):

After a pilgrimage to Neely’s Interstate BBQ in Memphis and sampling their phenomenal BBQ spaghetti, I was determined to recreate it for myself.  It’s not nearly as difficult as one would think, but it does take a bit of time.  For the record, if my writing seems disjointed or broken, I’m watching Nigella Lawson and am enthralled by her accent and, um, other attributes.

What you need: 

  • 1 tablespoon good olive oil
  • 1 small green bell pepper, chopped
  • 1 small yellow onion, chopped
  • 1 tablespoon garlic salt
  • BBQ sauce (recipe follows)
  • 1lb pork, beef, chicken, turkey, dog, cat – cooked and chopped to bits
  • 1lb spaghetti

First things first, the BBQ sauce:

  • 2 cups of ketchup (about 1 20oz bottle)
  • 1 cup water
  • 1/2 cup apple cider vinegar
  • 5 tablespoons light brown sugar
  • 5 tablespoons sugar
  • 1/2 tablespoon black pepper
  • 1/2 tablespoon onion powder
  • 1/2 tablespoon ground mustard (don’t skimp – get Colman’s)
  • 1 tablespoon lemon juice
  • 1 tablespoon Worcestershire sauce
What you do:
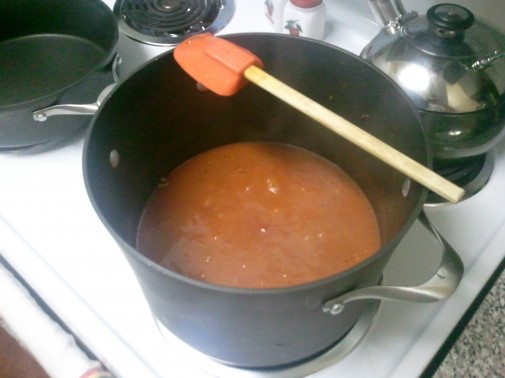
  1. Combine everything in a pot, bring it to a boil and then reduce to a slow simmer for about an hour or an hour and a half.  Length of time depends on how thick you want it.  There’s also a lot of wiggle room in the sweetness/bite of the sauce.  The recipe I listed is Neely’s original and it’s got decent balance.  However, I like a little more vinegar flavor so I added a bit more and cut back on the sugar.  If you want it sweeter, add more sugar/brown sugar.  The sauce as is has decent tang, but if you want some heat, throw in some cayenne pepper or some hot sauce to bring the spice up a bit.
  2. Once you’ve got the sauce square, heat up the oil and throw in the peppers, onion and garlic salt and cook everything until it’s nice and soft.  Once done, throw in the BBQ and bring to a boil.  Once boiling, put in your chopped meat and reduce to a simmer.  Bring your pasta water to a boil, salt it appropriately and then cook your pasta til al dente.  Mix the sauce/meat and the pasta and voila, BBQ spaghetti.
  3. For the meat, you have a lot of options – you can buy pulled pork (sans any kind of sauce) or brisket, brown some ground beef/turkey/chicken – whatever.  Just make sure you chop it up small enough so it blends well.  When I made this, I bought smoked pork loin from one of the BBQ joints down here and chopped it up and it turned out really well.  I doubled the recipe and it fed a dinner party of 10 perfectly, and I’ll take the lack of leftovers as a testament to how good it was.

OK – back to Nigella.

JC


Why Did You Eat That: Game On!

By |September 20th, 2011|Recipes, Why Did You Eat That?|

While the days of backyard barbecues and beach volleyball may be dwindling, there’s no need to fret.  The world is not ending, my friend.  Nothing warms the heart (or the home) like entertaining close friends in your very own cozy abode.  The temperature is dropping and it seems to get dark by the time you’ve arrived home from a long day at the office, so it’s easy to become a bit of a homebody.  But maybe being a homebody isn’t such a bad thing.

The Plan:

Gather a group of your most playful pals for a rousing and raucous game night complete with old school board games, yummy snacks, and silly prizes.

The Invitation:

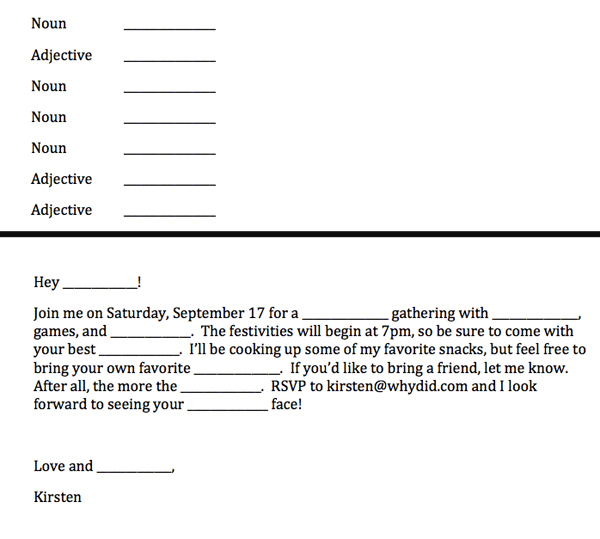
Start things off and set the tone for the evening by sending out a personalized Mad Libs invite.  Be sure to include all of the relevant information (date, address, time, etc.) and leave blanks for silly adjectives and nouns.  Get creative and be sure to ask guests to share their Mad Libs creations.

The Menu:


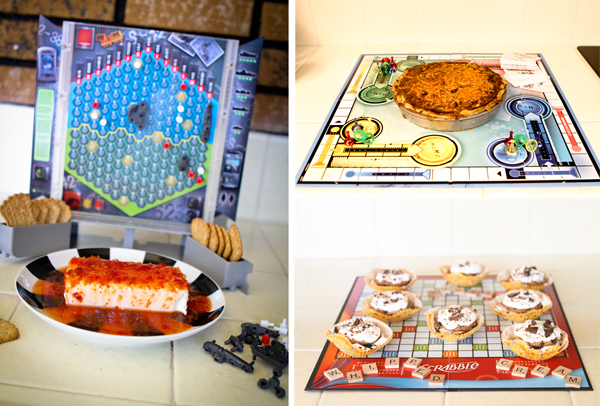
Game night isn’t the type of gathering that requires a fancy sit down dinner.  Keep things casual by setting up a “self serve” table with bites that are easy to eat while rolling the dice with one hand.  Mini quiche, delicious dip, and tiny desserts are great options for fun finger food. Arrange your no fuss fare on gameboards and embellish with gamepieces to keep the festive theme consistent.

For the rest of this post– and the party perfect recipes click here and read on.  Also, please take a moment to vote for my entry in Lucky Magazine’s Lifestyle Contributor contest.  It will require you to “register” but it only take a few moments and my appreciation will be exponential! 

xx,

WhyDid

Why Did You Eat That: Put Some Pep(peroni) In Your Step

By |August 29th, 2011|Recipes, Why Did You Eat That?|

20110829-111010.jpgYou might have noticed that I’ve been a bit slow with my blogging lately. Well, that’s because I’ve returned to my birthplace. My roots. My home away from home. Wheeling, West by God Virginia. And while I do enjoy laying around lackadaisically, I do not enjoy the fact that my sweet, sweet mother has yet to set up her wireless Internet making me feel as if I am, in fact, in the boondocks.

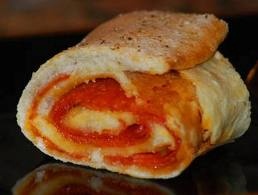
Anyway, I thought I would share the recipe a little local delicacy known as the pepperoni roll. Here’s the funny thing- I never realized this was a regional delight because while I was born in West Virginia I grew up in Florida. My mom made pepperoni rolls for our school lunches (lot better than a turkey sandwich, eh?) and so I spent my formative years thinking this was a normal thing and everyone’s mom had made them pepperoni rolls at one point or another. That is until I headed to the Big Apple and got the same looks as a person saying, “please” when I mentioned this tasty treat. Upon further research I found that the rest of the world was not privy to pepperoni rolls and so today I’m going to share a wonderfully simple recipe.

Ingredients:

  • 1 8 oz. can of Pillsbury Crescent Rolls
  • Approximately 5 oz. pepperoni sliced
  • 1 cup marinara sauce
  • 3/4 cup shredded mozzarella cheese

Directions:

  1. Preheat oven to 375 degrees and separate dough into triangles on non-stick cookie sheet.
  2. Drizzle center of triangle with sauce and arrange pepperoni and cheese on top of sauce.
  3. Roll into a crescent.  Repeat for all dough.
  4. Bake in oven for 10 to 15 minutes.

Now, I’m aware there are probably some pepperoni roll purists out there shaking their heads and scoffing at my simple recipe– but it’s all I got and it’s pretty damn tasty (in my humble opinion).  So, the next time you’re traveling through the great state of West Virginia (HA!) be sure to stop for a snack and make sure it’s a pepperoni roll.

xx,

WhyDid